4. DVDneXtCOPY DVD Ripper
4.1 Product Introduction
DVDneXtCOPY DVD Ripper can easily rip any DVD to MP4/MKV, etc, and convert DVDs to audio formats such as FLAC and MP3. It also enables you to extract SRT files from DVDs. In addition, this module provides built-in video editing functions, allowing you to crop, trim, and merge videos, as well as add watermarks or external subtitles.
4.2 How to Use DVDneXtCOPY DVD Ripper
4.2.1 Load DVD
After you launch DVDneXtCOPY, switch to the Ripper module on the left, and then insert a DVD into your PC drive. The program will detect and load the DVD as the source automatically.
When the source is a DVD folder or ISO file, you can use the +Add Source button or simply drag and drop it to the main window of DVDneXtCOPY.
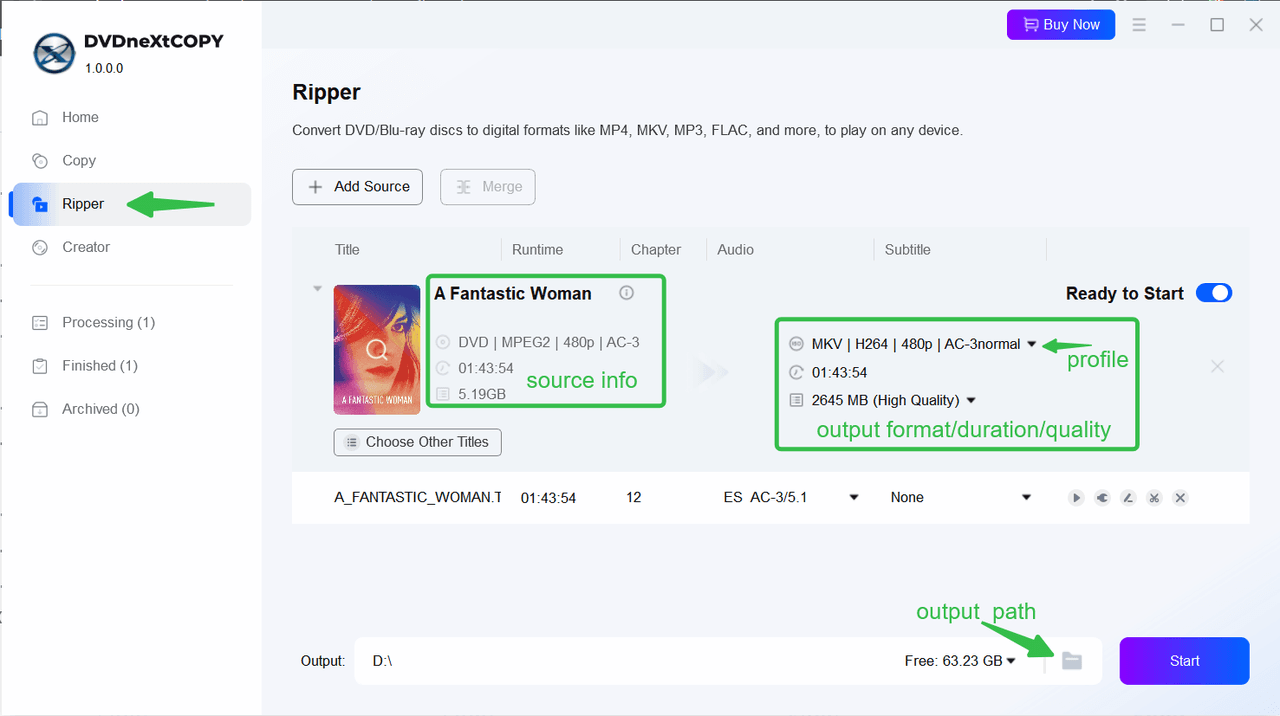
4.2.2 Select Output Profile
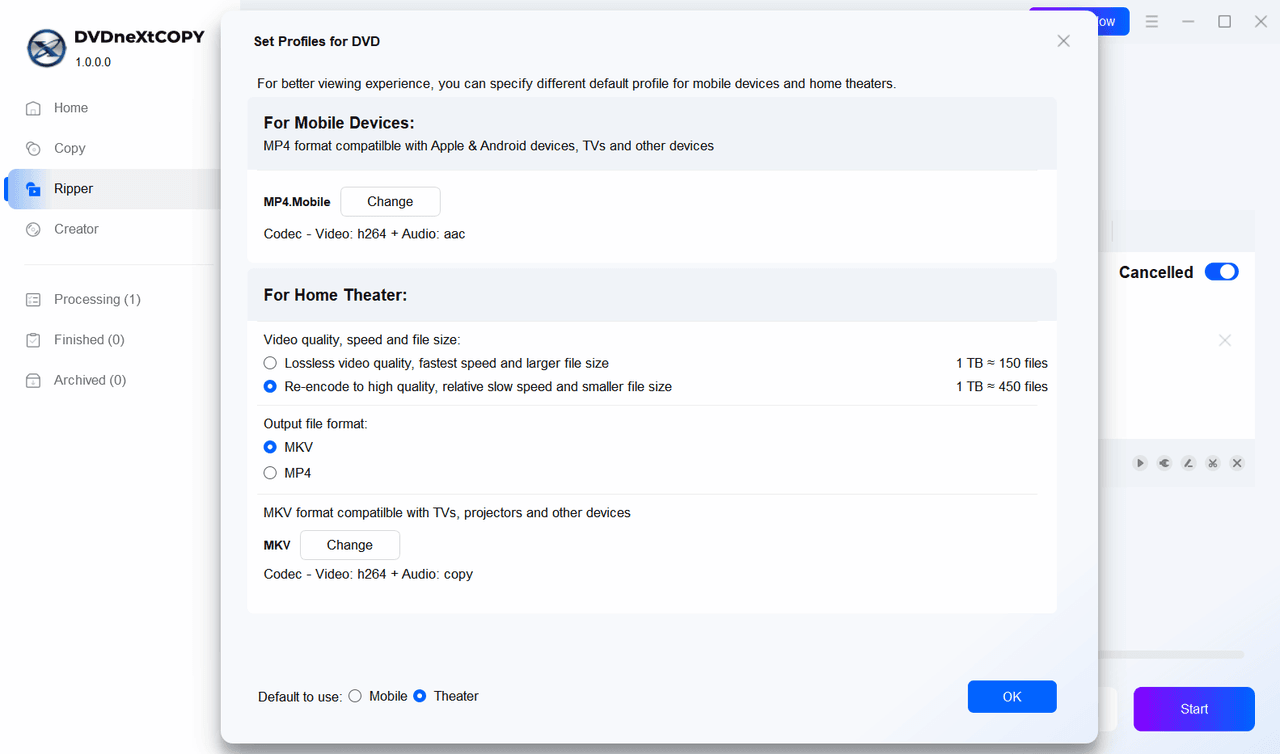
Click on the profile option, you will get a window like below asking you to set the default format (MKV/MP4) and quality (lossy or re-encode) for mobile devices and home theaters. This happens if this is the first time you run DVDneXtCOPY and have not yet set the default profile for DVD in the Common Settings.
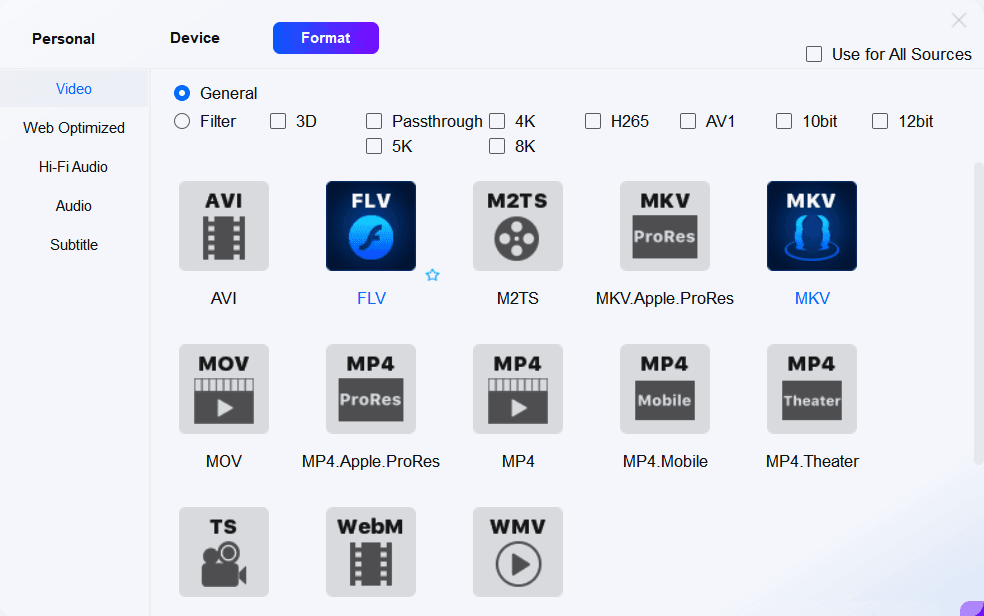
If you have already set the default profile, you will get the profile window where you can choose a video format like MP4 to convert a DVD to MP4 format, or choose an audio/subtitle format depending on your needs.
4.2.3 Adjust Settings
Title/Audio/Subtitles
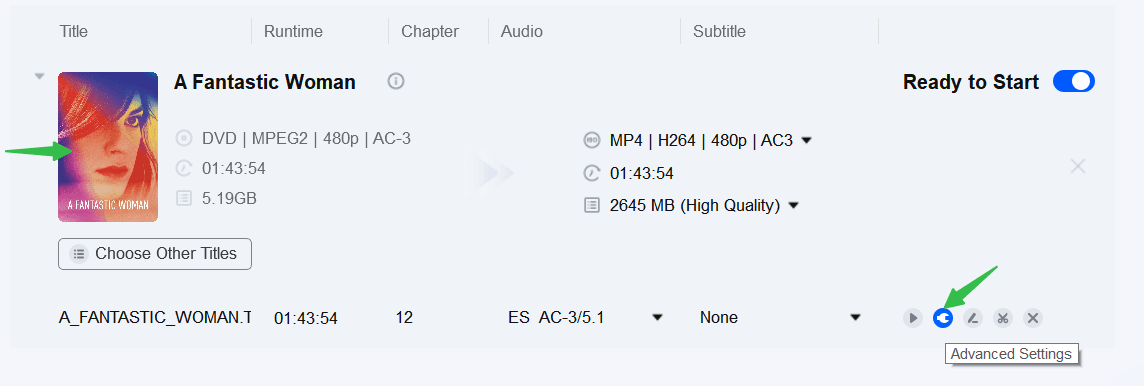
Update the output name, select the chapter range, and choose the audio and subtitles you want to output for that title.

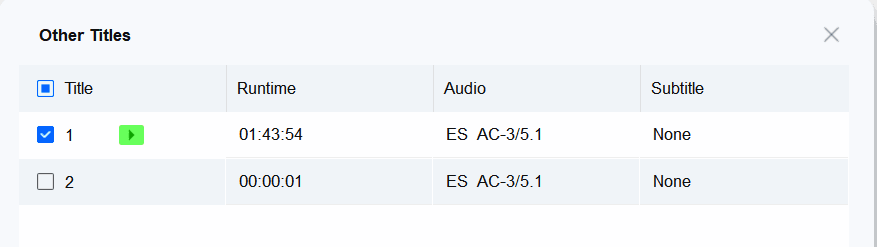
Open the Other Titles window, you can select another title or add other titles to the Ready to Start list.
Advanced Settings
Click on the Advanced Settings button to adjust the video and audio codec, and pick a subtitle mode (both hard copy and soft copy subtitle modes are available).
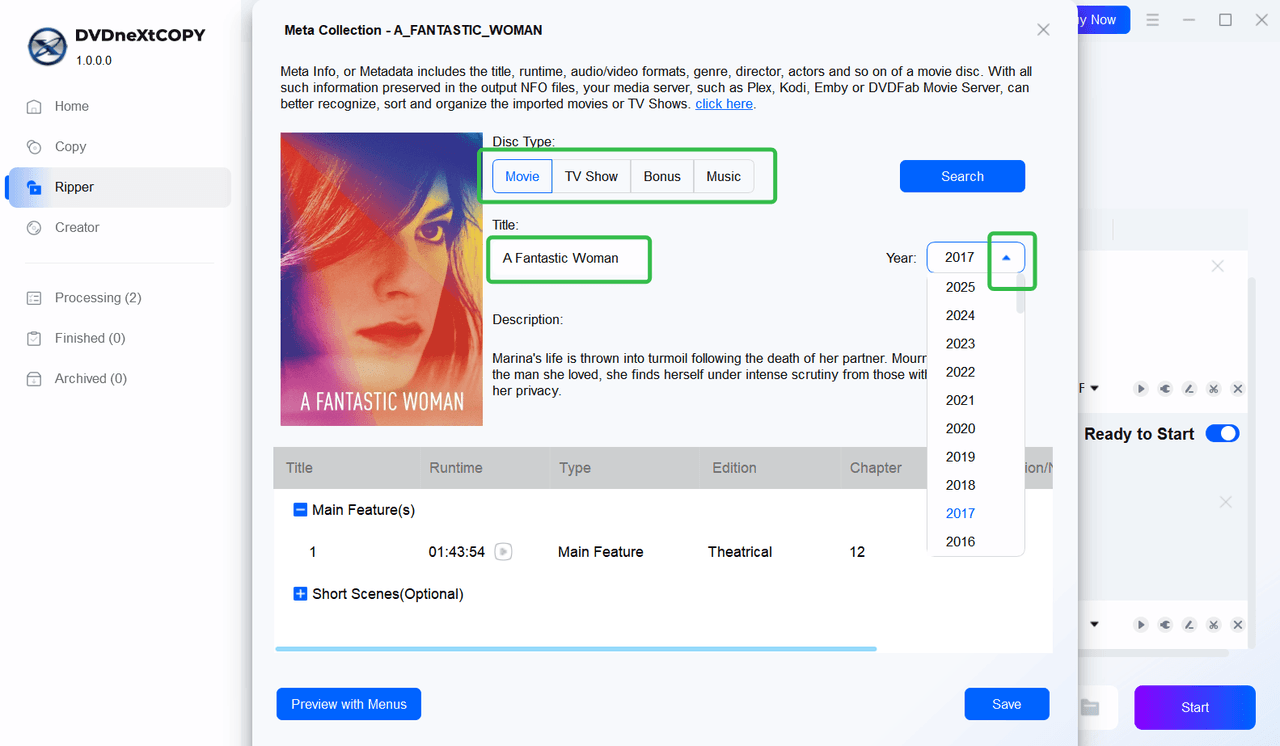
Meta Manage
Click on the movie poster to open the metadata window, where you can change the disc type, title, and year of the DVD to search for the correct metadata if needed.
4.2.4 Edit DVD
Next to the Advanced Settings button, you can find the Video Edit and Trim features.
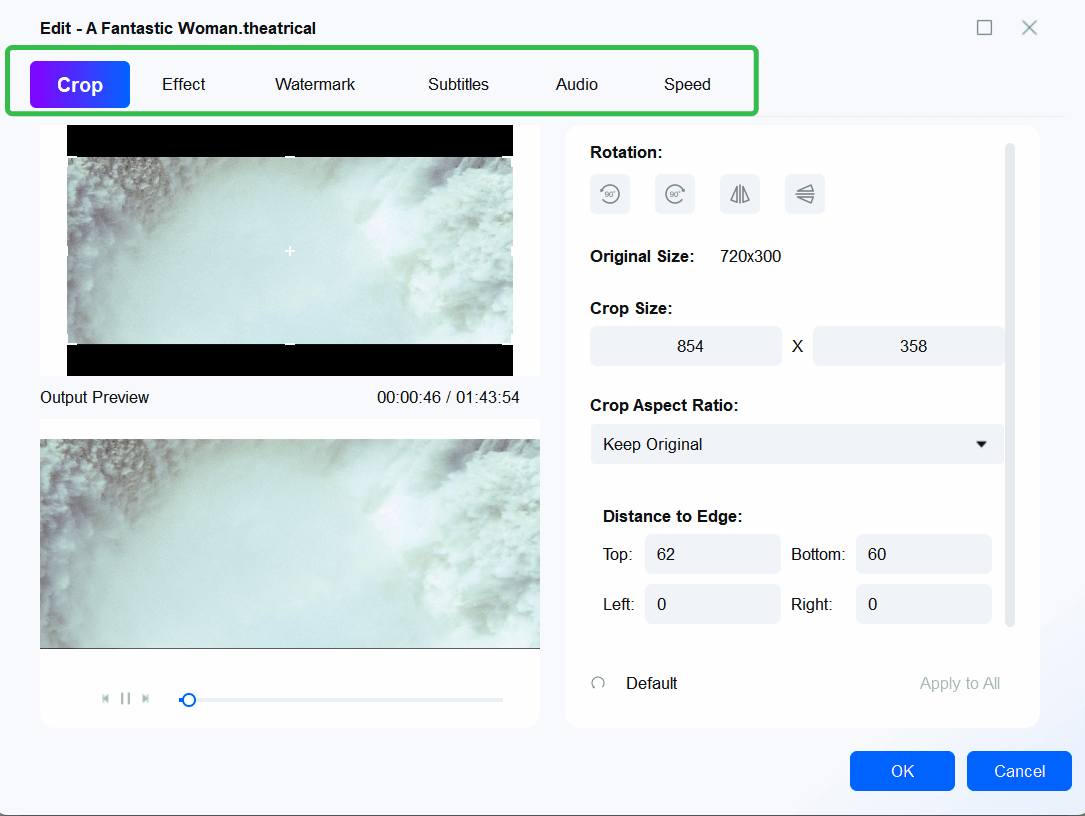
Edit
In the Edit window, you can crop (Keep Original, Full Screen, 16:9, etc) and rotate the video, adjust brightness/contrast, add text or pictures as watermarks, add external subtitles, change the audio volume, remove background noise if needed, and change the default playback speed.
Trim
Open the Trim window to remove the scenes you do not want to show in the output video.
Step 1. The first clip starts from the opening scene of the DVD. Move the red slider to and then click the Scissors button to create an endpoint in clip 1. It will also create a clip 2 starting time.
Do the same for the other clips.
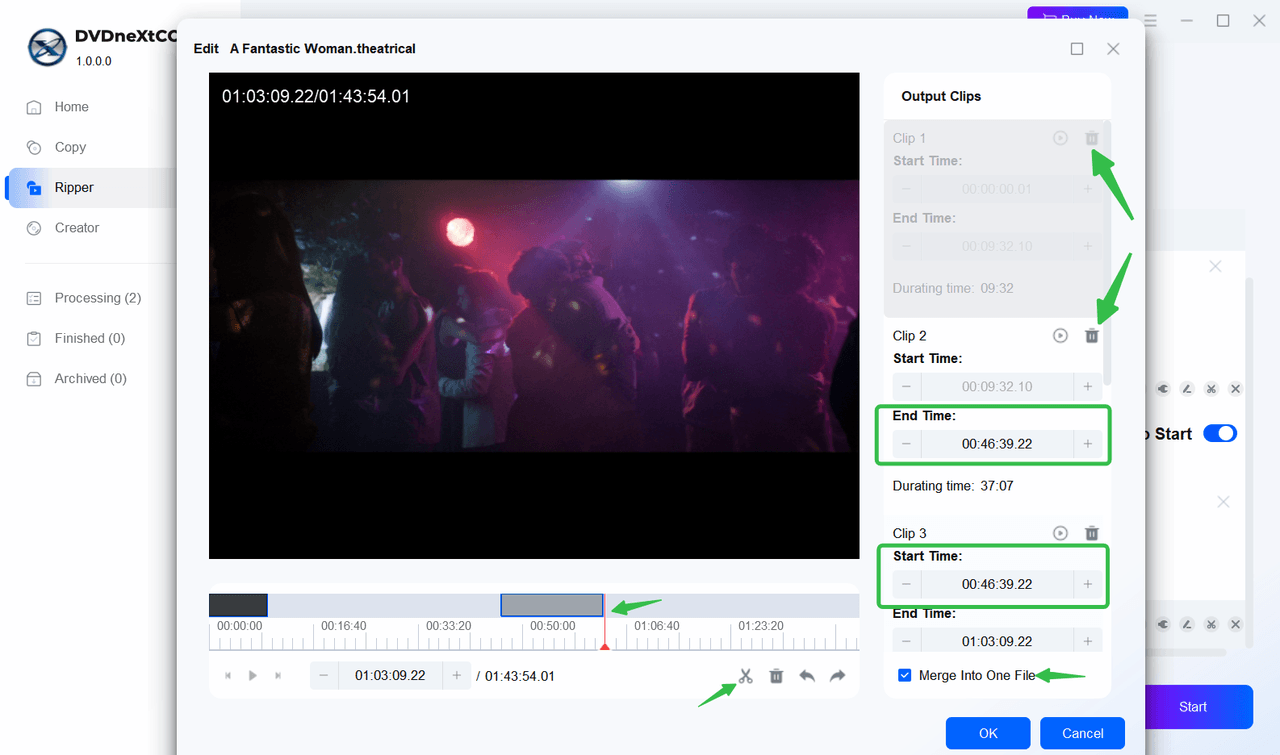
Step 2. All the clips will be displayed on the right pane, and then click the Trash button of the clip that you do not want to keep; The trashed clips will become grayed out, leaving clips with start/stop time needed!
Step 3. Final step, click the OK button.
By default, those clips that have not been trashed will be merged into one file; if you want to output them separately, uncheck the option "Merge Into One File".
When you check the main interface of the title, you will notice that the runtime has been updating accordingly.

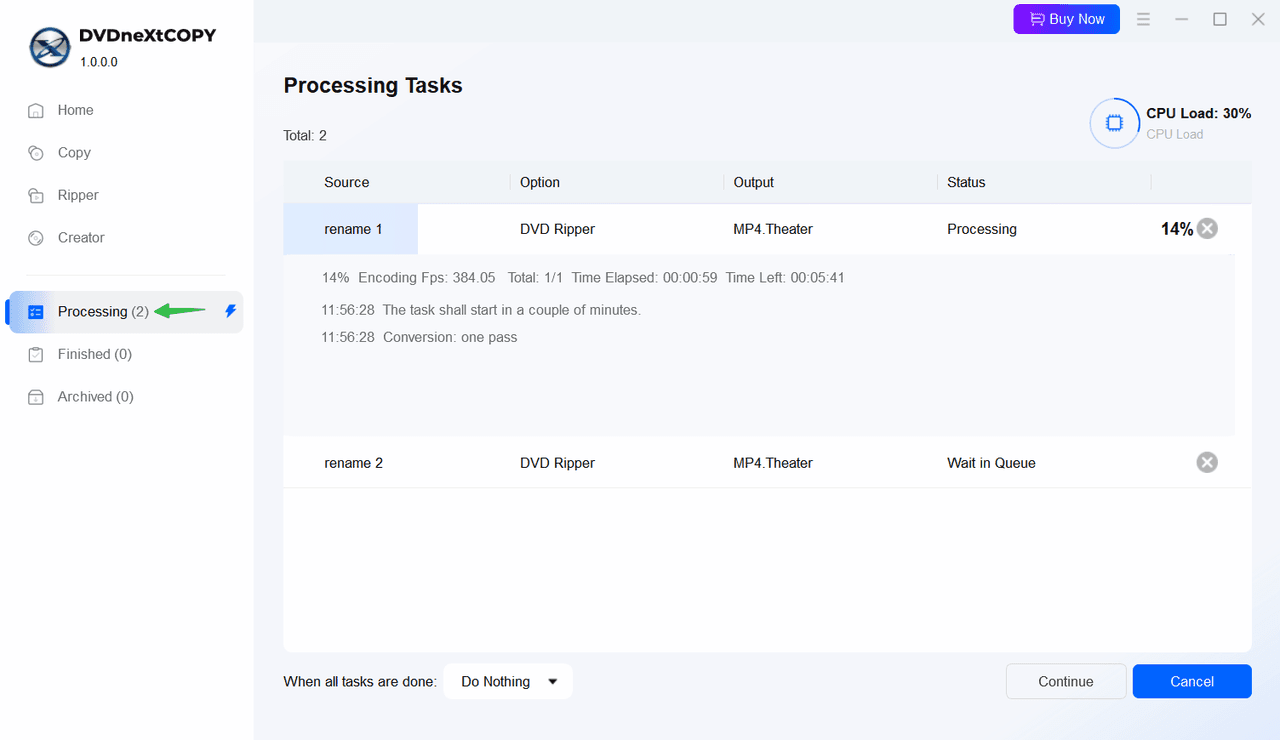
4.2.5 Rip DVD
Change the output directory in the lower area and then click Start to initiate the ripping process. Once the process completes, you will get the output file in the directory you set previously.