3. Common Settings
3.1 Main Interface
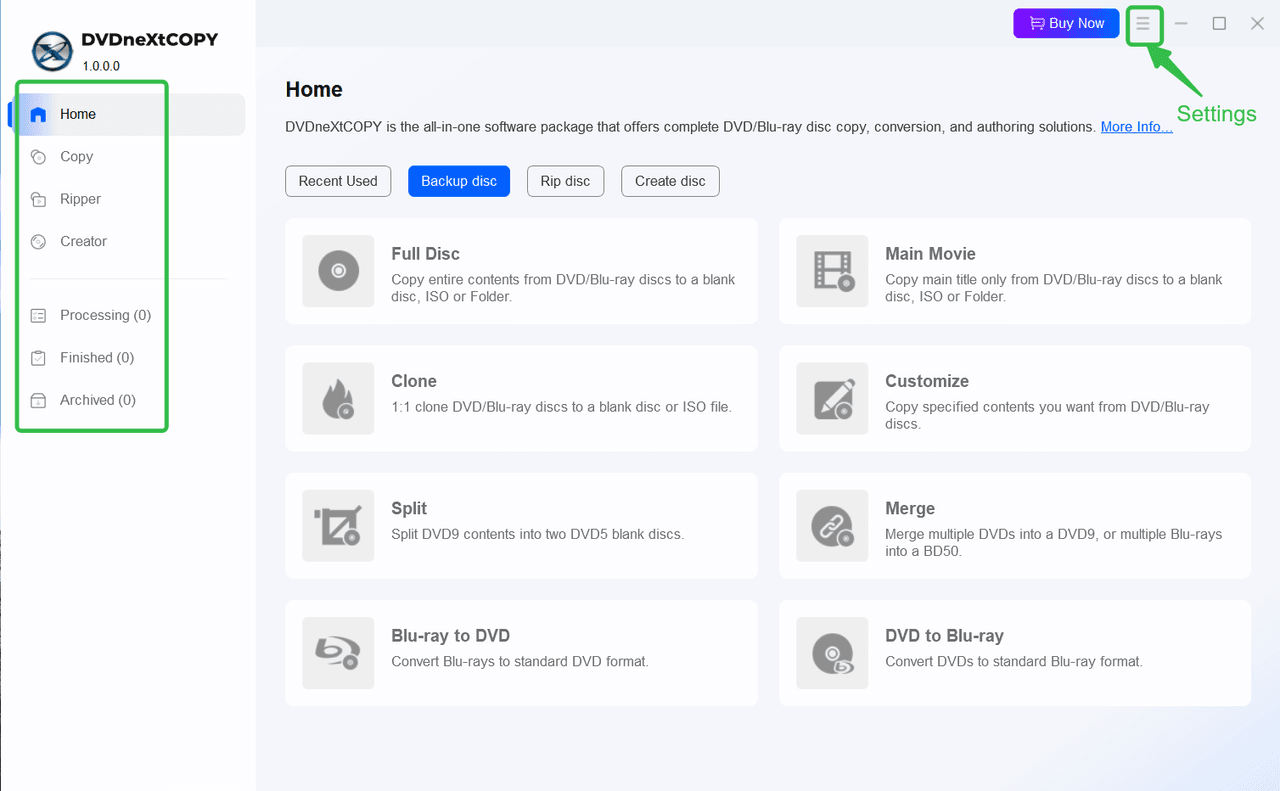
On the left pane of the DVDneXtCOPY main interface, you can find the entries for all the products/modules available in DVDneXtCOPY, and check the statuses of different tasks in the lower area.
3.1.1 Home
- Recent Used: Here in this window, you will find the options you used recently.
- Backup disc: You can quickly enter a specific copy mode to back up a disc. Available copy modes are: Full Disc, Main Movie, Clone, Customize, Split, Merge, Blu-ray to DVD, and DVD to Blu-ray.
- Rip disc: You can choose to rip DVD/Blu-ray to mobile, which will give you a smaller file size compared with the "Rip to Theater" option. If you want to extract audio only, use the "Rip to Hi-Fi Audio" option. If you only want to get subtitles out of the disc, then use the "Extract Subtitle Only."
- Create disc: Entry for DVD Creator and Blu-ray Creator.
3.1.2 Copy
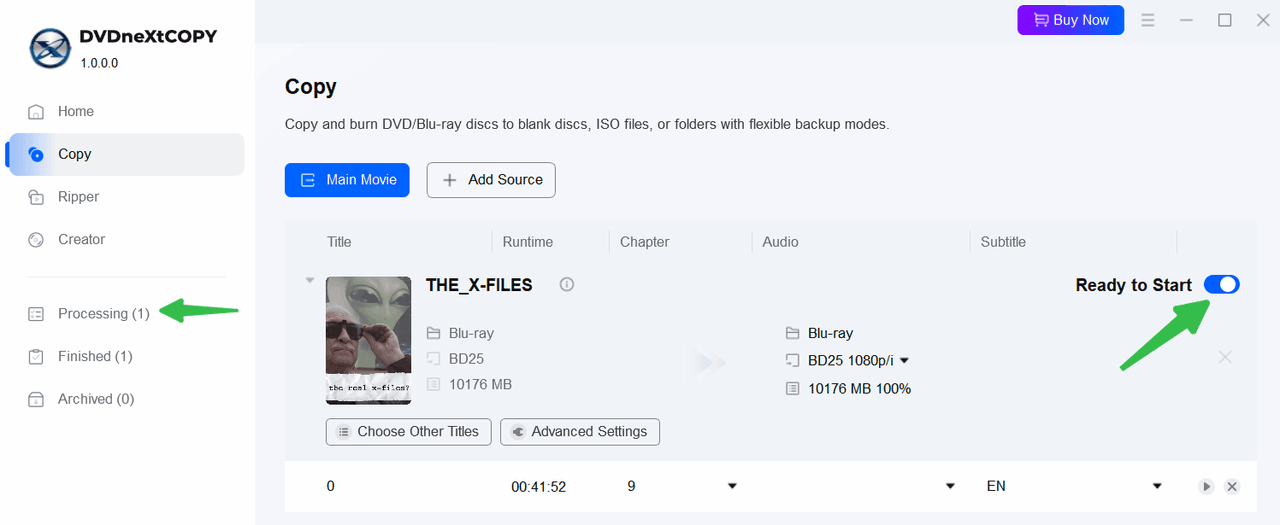
Under the Copy module, you can use DVD Copy and Blu-ray Copy. When you insert a DVD, it will automatically use DVD Copy. When Blu-ray is detected, it will automatically switch to Blu-ray copy.
In this place, you can switch the copy modes. Depending on the source you load, you can switch between Full Disc, Main Movie, Clone, Customize, Split, Merge, Blu-ray to DVD, and DVD to Blu-ray.
3.1.3 Ripper
The same as the Copy module, the Ripper module will automatically detect the sources and then switch to DVD Ripper or Blu-ray Ripper accordingly.
3.1.4 Creator
Entry for DVD Creator and Blu-ray Creator. Pick DVD Creator if you want to convert videos into a DVD that is compatible with standard DVD players, and choose Blu-ray Creator to convert videos into Blu-ray format.
3.1.5 Processing Tasks
Whenever you enable a source under the Copy/Ripper/Creator module, it will automatically add it as a new task to the Processing window. The newly added tasks will be waiting on this list.
The Processing Tasks window displays the source title, the option you used, the output format, and the status of the tasks. You can select the tasks and hit the Start button to proceed with them one by one. If you want to start a specific task later, you can also choose to archive it or simply delete it.
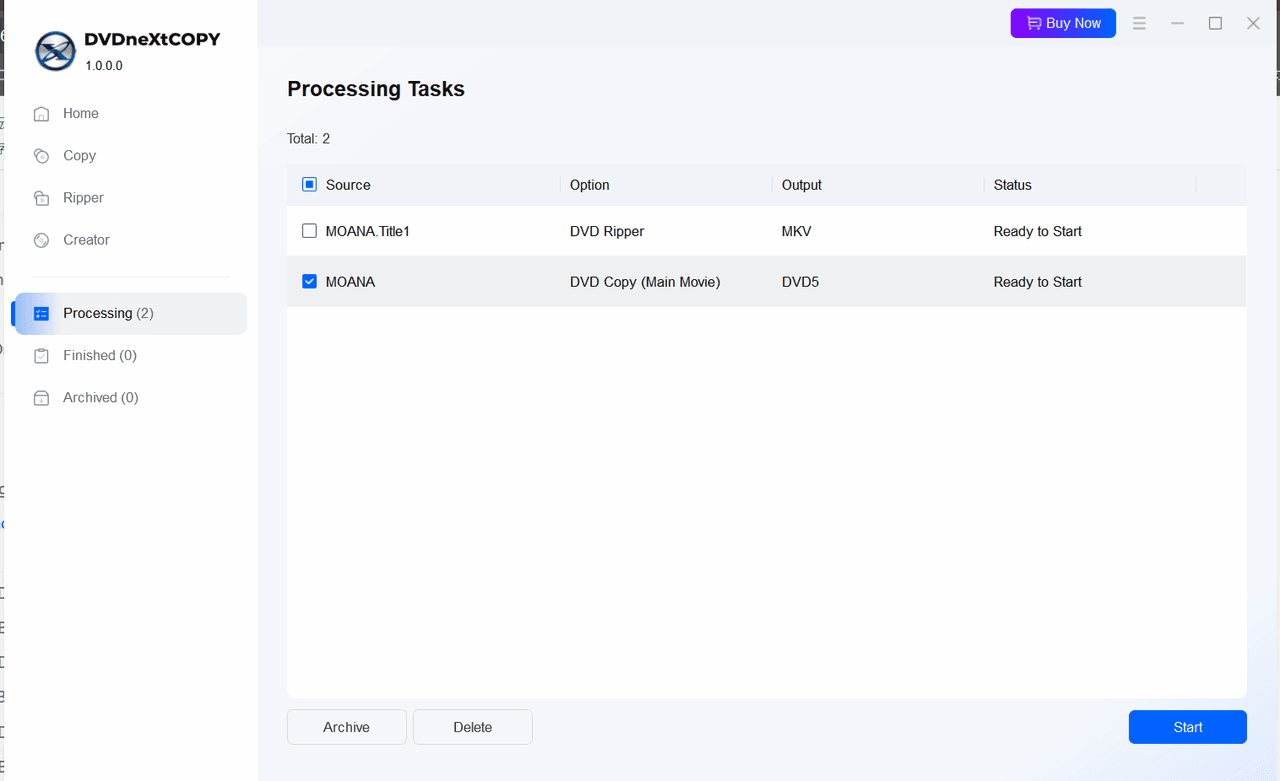
Once you click "Start", the status will change accordingly for each task.
Meaning of different "Status":
- Ready to Start: After triggering the source, all tasks will appear as "Ready to Start"; typically, this means that you have completed the settings associated with that task. You can still go back to the corresponding module to change relative settings before you hit the "Start" button.
- Processing: It means that the task has been started and is currently in progress; at this point, changing settings related to that task is impossible.
- Wait in Queue: It means that the task is currently waiting to be processed, which shall begin after the previous task is finished.
- Success: It means the task has finished successfully.
- Failed: It means that the task has failed.
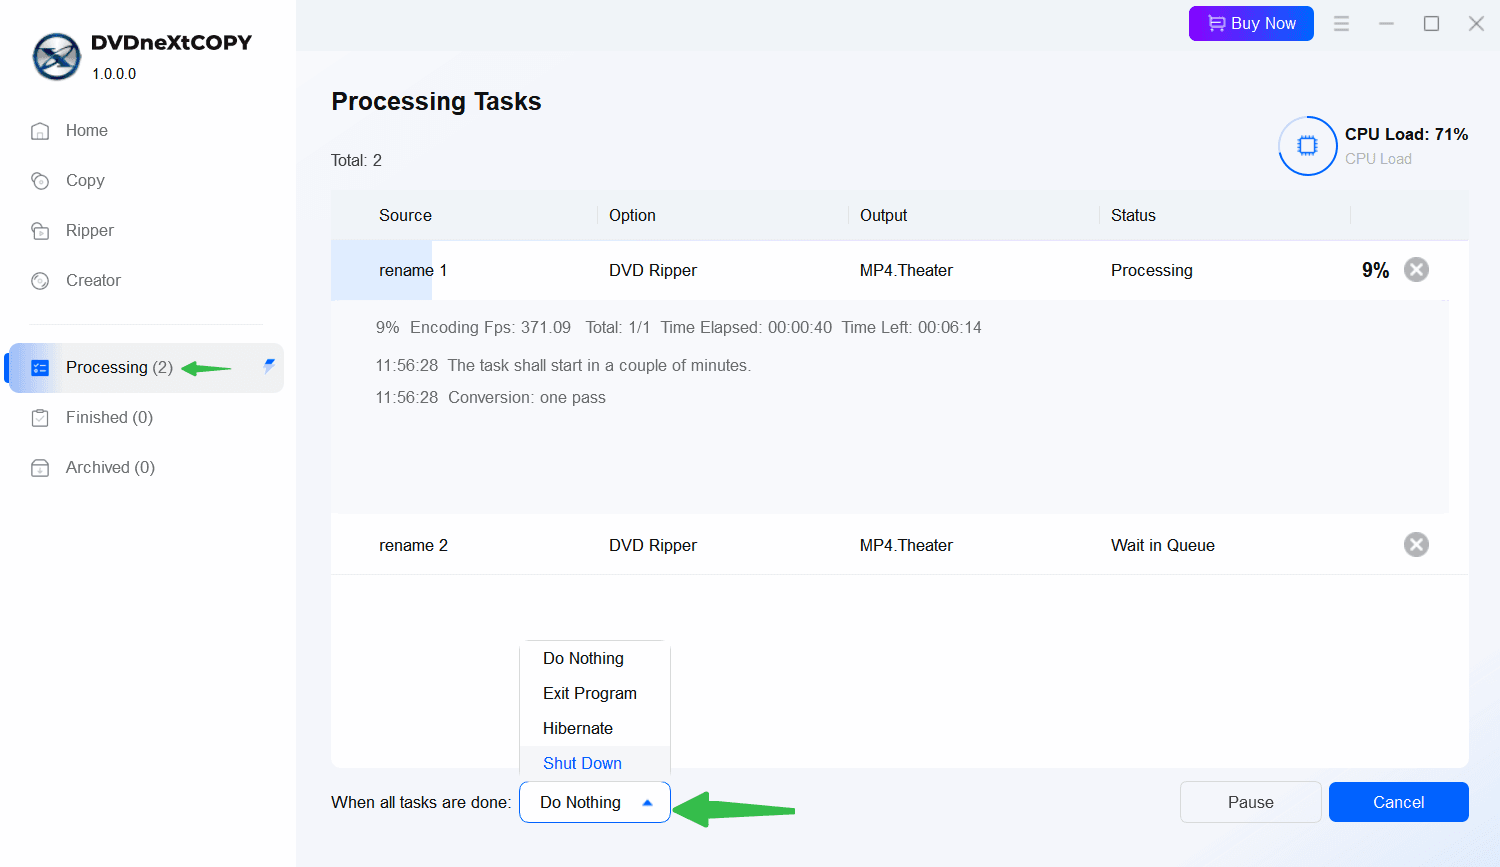
You can also set what the program should do when all tasks are done in the Processing window: Do Nothing, Exit Program, Hibernate, and Shut Down.
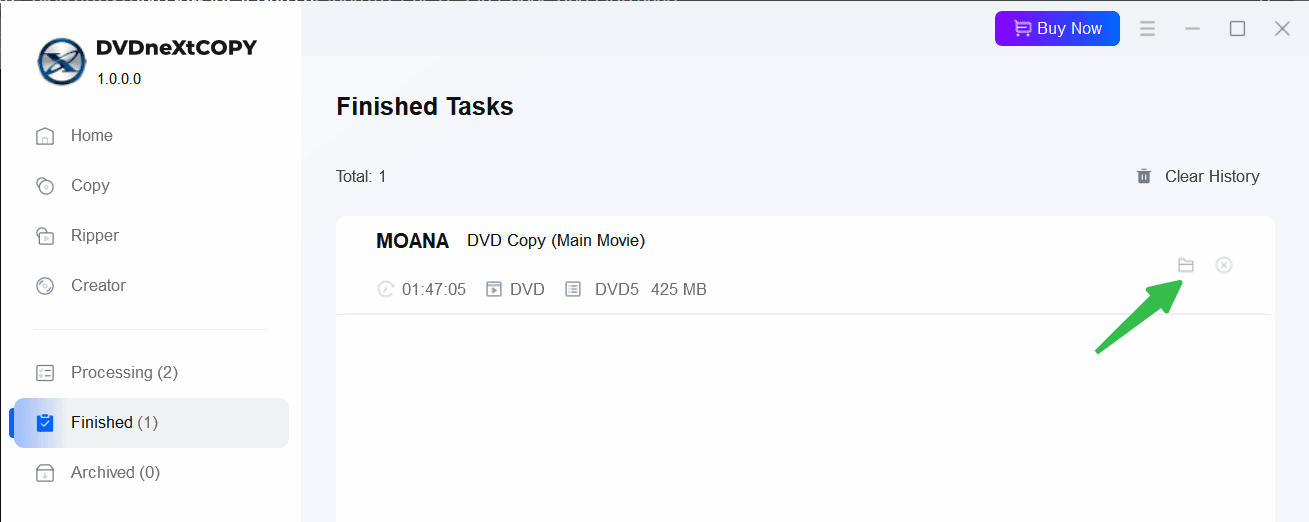
3.1.6 Finished Tasks
Finished Task is the place where all the completed tasks are displayed. You can get the basic information in this window: runtime, source type (DVD/Blu-ray), output format, and file size of the tasks. And you can open the output file using the Folder icon of the Task.
If you do not want the task records, simply click the "Clear History" icon to remove them.
3.1.7 Archived Tasks
Archived Tasks is the place where failed, crashed, and unexpectedly exited tasks are saved, including the tasks you archive intentionally in the Processing window. It will keep the settings you set up last time. You can reload these tasks from here directly without doing it all from scratch.
Important note: If the source of a specific task was created from a disc source, but the disc is currently not ready in the drive, you can't reload it from the Archived Task.
3.2 Settings
In the upper right corner of DVDneXtCOPY, click the three-bar icon to display the software's menu options.

- Open Recent: It will list the sources you have opened recently.
- Authorize: Open the Authorization box, where you can enter your registered account information to activate the products you have.
- Deauthorize: Disable the license on the current computer.
- License Info: Display the status of all the products in the DVDneXtCOPY.
- Member Center: Click to open the member center on our website.
- Feedback: Submit your feedback about our software, and it will automatically enclose the latest log files and create a Ticket that can be tracked at Member Center > Get Support > Ticket.
- Check for update: Click it, and it will detect if there is a new version available.
- Open Log Folder: It will open the directory where the log files are saved.
- About: Display the version number, release date, official website, and the copyright info of DVDneXtCOPY.
3.2.1 Settings
These are general settings and settings related to the copying and ripping process.
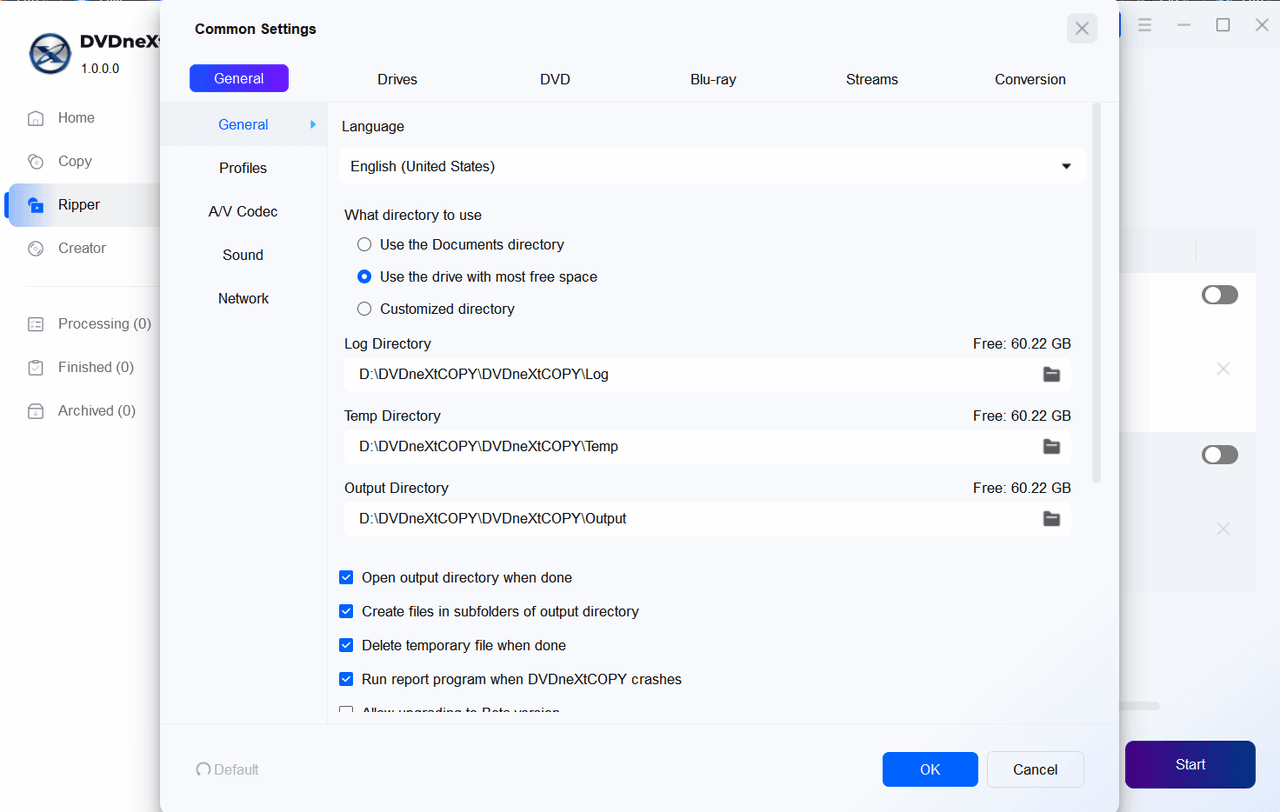
3.2.1.1 General
A. General tab
Language:
Choose the UI language you want the software to display.
What directory to use:
Use the Documents directory: This is the default one, normally it will be in drive C.
Use the drive with the most free space: When you select this one, it will automatically detect the disk space and select the one that has the most available disk space.
Customized directory: You will need to manually select a path using the Folder icon for the Log, Temp, and Output directories.
Open output directory when done:
Automatically open the containing folder where the output is saved after a task is finished.
Create files in subfolders of output directory:
Automatically create a subfolder containing the output file in the output directory when the task is done.
Delete temporary directory when done:
The place where the temp files are saved during a specific task. If you check this option, the file will be deleted automatically after the task is finished.
Run report program when DVDneXtCOPY crashes:
A report field will automatically pop up and be sent to us, which can be helpful in checking the crash problem.
Allow upgrading to Beta version:
This feature will make Beta versions available to you.
Shut down the main interface:
This determines what to do next when tasks are finished. You can let the program minimize to the system tray, exit itself, or ask you each time.
CPU cores running for DVDneXtCOPY:
You can configure your CPU cores to run for DVDneXtCOPY. The larger the number, the more resources it will use during the tasks, and other software may become slow. So we don't suggest you choose the maximum if you want to run other software or programs at the same time.
Move program icon to systray when minimizing the main surface:
You can choose to move the program icon to the system tray or not when you minimize it.
Add Auto-play handler (Optionally, start DVDneXtCOPY when DVD/Blu-ray Disc inserted):
Enable this feature, DVDneXtCOPY will auto start itself and access the disc whenever you insert a disc in your disc tray.
Add context menu to open video source by DVDneXtCOPY:
This option will make DVDneXtCOPY appear in the context menu when you right-click on a video file.
Allow running multiple instances of DVDneXtCOPY:
By enabling this option, more than one thread of DVDneXtCOPY can be run simultaneously.
Prevent standby/hibernation/screen saver when processing:
During a task, the system will prevent itself from switching into power saving and sleep mode; the screen saver will be disabled to avoid ceasing the tasks.
Check for on-the-fly decrypter automatically:
DVDneXtCOPY will auto-detect the other decrypting software possibly running in the background and alert users to close them for more reliable performance of DVDneXtCOPY.
- Check for DMA automatically: This option is disabled by default.
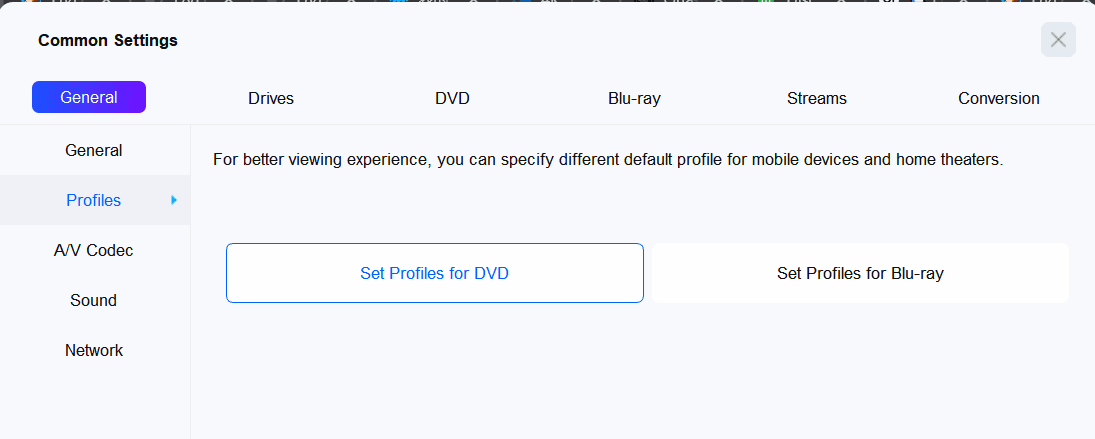
B. Profiles
You can set the profile options, including quality and codec, and the output video format you want to use by default for DVD and Blu-ray ripping for a better user experience.
C. A/V Codec
Settings on this window refer to the applied video decoder and encoder for different sources (H.264/VC1/MPEG2/H.265/AV1).
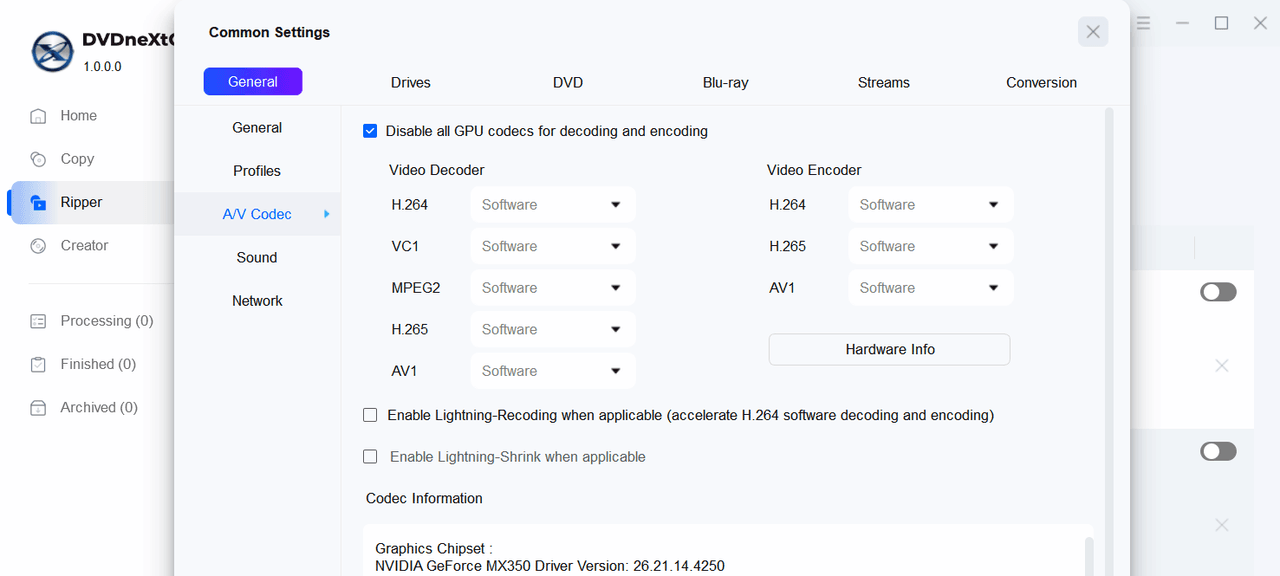
Disable all GPU codes for decoding and encoding:
Disabling all the GPU codecs could result in a slow compression or conversion speed, but it could also ensure a stable processing performance and quality output.
Video Decoder:
Available options vary depending on hardware performance. Typically, available options include Software, CUDA, DXVA, AMD APP, Intel Quick Sync, and Core AVC.
Video Encoder:
Same as "Video Decoder", depending on the performance of your computer.
Hardware Info:
You can analyze and check your computer hardware information, and check what Decoders and Encoders are available for use.
Enable Lightning-Recoding when applicable (accelerate H.264 software decoding and encoding):
This will help dramatically reduce the time used for copying Blu-ray Copy using Full Disc and Main Movie mode.
Enable Lightning-Shrink when applicable:
Applies when compressing or ripping Blu-rays.
Codec Information:
It shows the capability of your graphics chipset and the supported video codecs of your system.
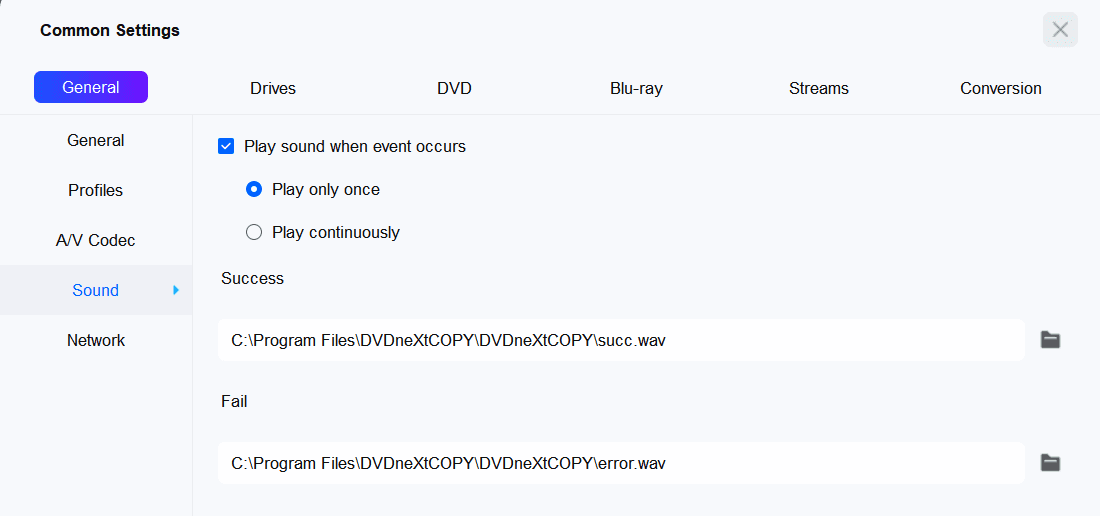
D. Sound
Setting how the warning sound plays when an event occurs in this window. You can set the sound to play once or continuously. Sound for Success tasks and Fail tasks can be set separately.
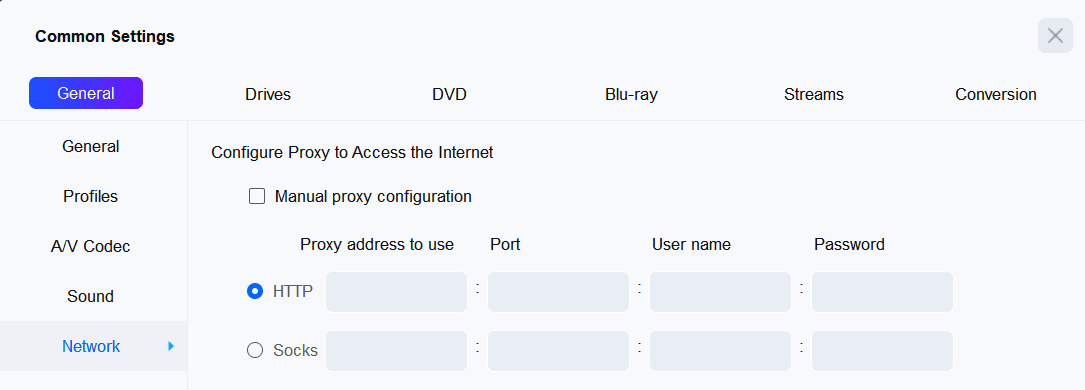
E. Network
Here you can configure the proxy settings for DVDneXtCOPY. The software will access the internet using the proxy configuration you set.
3.2.1.2 Drives
A. Drives
Specify the drives that should be processed.
B. Read
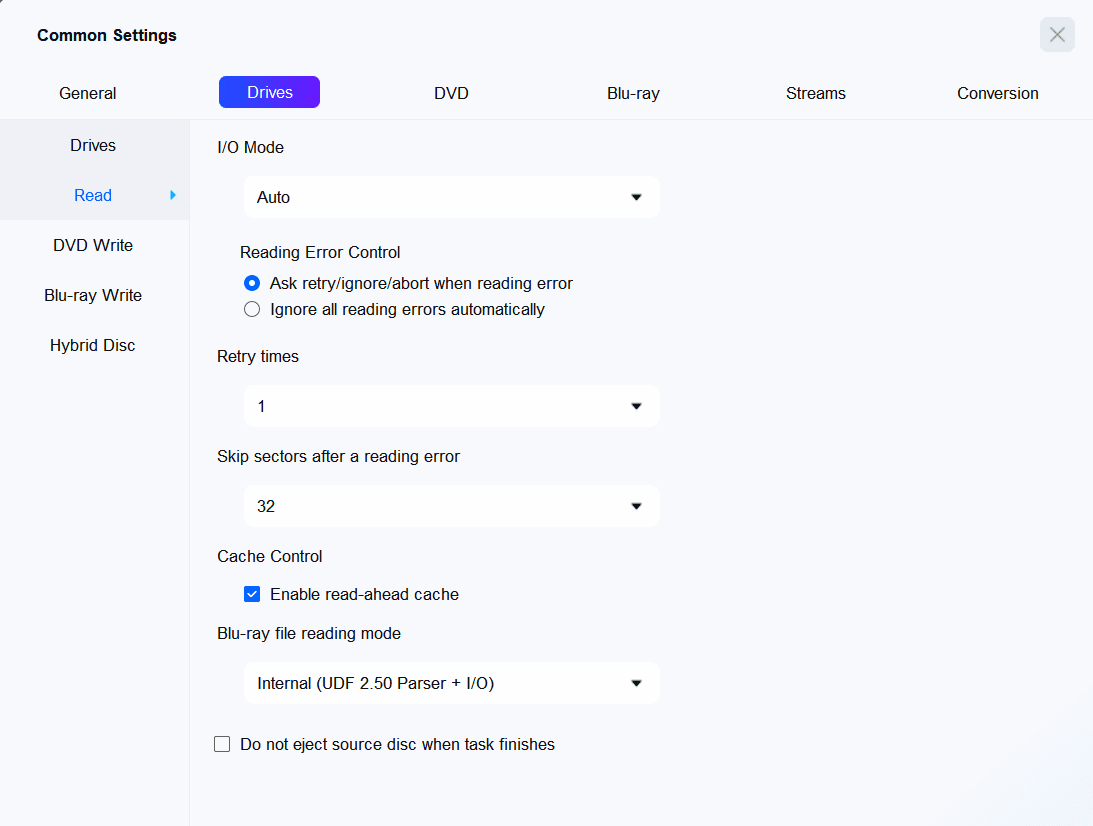
I/O Mode:
The program will automatically use the best way for reading discs through a drive. The available options are: AUTO, ASPI, SPTI, and Passkey. Generally, the Auto mode is recommended. When a reading error occurs, you can try to switch to another mode.
Reading Error Control:
Read errors generally indicate a dirty or scratched disc.
1) Ask retry/ignore/abort when reading error: Enable this option, and the software will pop up a window asking you how to deal with the reading error encountered.
2) Ignore reading errors automatically: By selecting this option, the software will ignore read errors encountered. Ignoring read errors skips bad sectors, which means that a certain part of the source will be skipped; if there are too many errors, you may experience poor playback.
Retry times:
Select the number of retries to read the CD-ROM drive in the event of a read error, up to a maximum of 10 retries.
Skip sectors after a reading error:
When a reading error occurs, it means that a certain sector cannot be handled by the software. You can skip the scratched/bad sectors of the source disc and set it to skip up to 64 sectors.
Cache Control:
Enabling read-ahead cache can efficiently improve the drive and data reading performance.
Blu-ray File Reading Mode:
It will, by default, use the best mode available for reading Blu-ray discs.
Do not eject source disc when finished copying:
By default, the software will eject the original disc when the copying phase completes. Check the option if you want to keep the source disc in the drive.
C. DVD/Blu-ray Write
These settings apply to DVD Copy/Blu-ray Copy, DVD Creator/Blu-ray Creator.
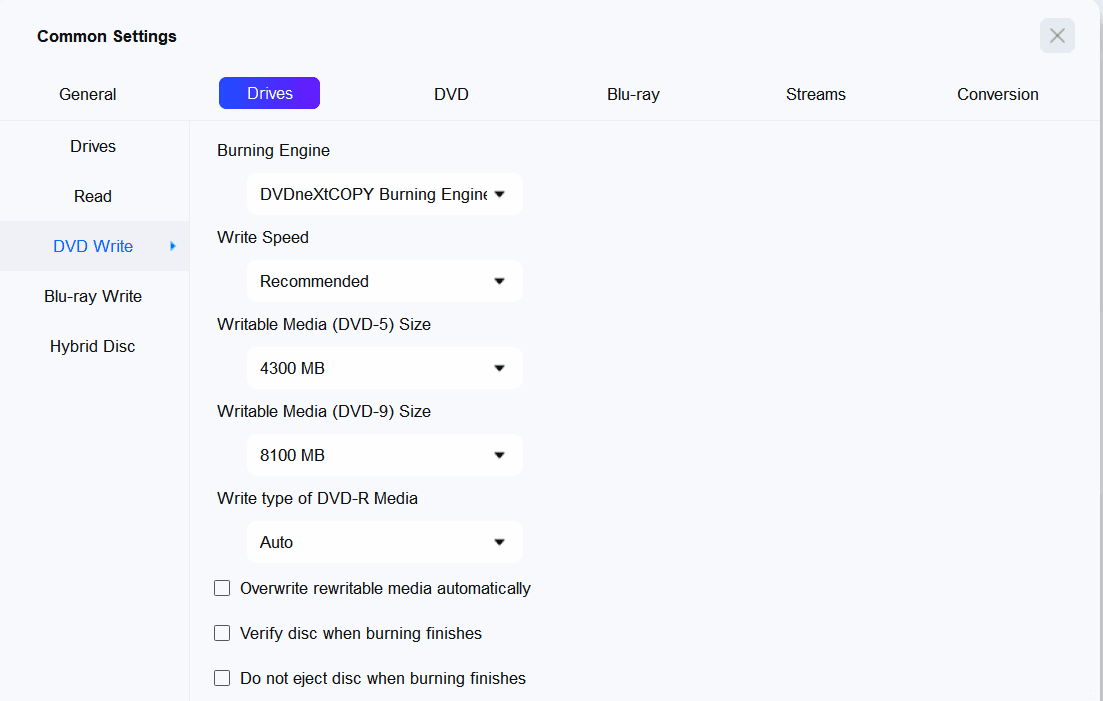
- DVD Write
- Blu-ray Write
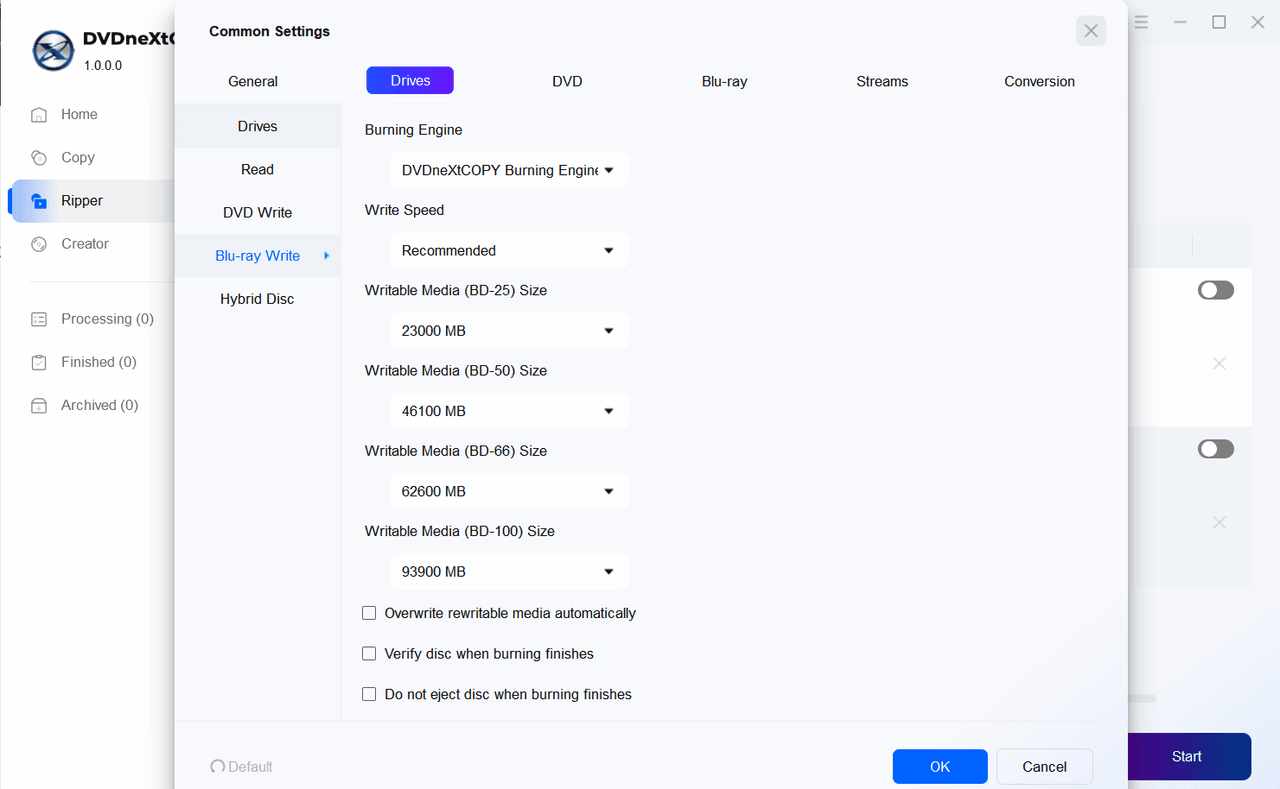
Burning Engine:
Available options are DVDneXtCOPY Burning Engine and ImgBurn. You will need to download and install ImgBurn on your computer before you select it.
Write Speed:
Choose a reasonable burning speed according to your burner/drive and the blank capability. Slow down the writing speed can make the burning process smoother.
- For DVDs, the recommended burning speed is generally 8x to 16x. If compatibility with older players is a concern, consider burning at a slower speed.
- For Blu-ray discs, burning at 4x to 6x is generally recommended to ensure data integrity and compatibility.
DVD/Blu-ray Writable Media Size:
The default size 4300 MB for DVD-5 and 8100 MB for DVD-9 is recommended. And the recommended size for BD-25 and BD-50 is 23000 MB and 43000 MB, respectively.
You can also customize the size if needed. However, burning too close to the disc edge could increase the potential of a playback issue.
Write type of DVD-R Media:
There are three options: Auto, SAO writing, and Packet writing.
Auto is the simplest for users, SAO is for complete sessions that can be finalized, and Packet allows for flexible writing and editing on the disc. It's recommended to use Auto if you are not sure which one to pick.
Overwrite rewritable media automatically:
Checking this option allows the system to overwrite the rewritable media automatically.
Verify disc when burning finishes:
This means that after the burning process is complete, the software automatically checks the data written to the disc against the original files on your computer.
Set booktype to DVD-ROM (only for DVD+R/RW media):
Some standalone players are friendlier with DVD-ROM booktype, click this option to make the resulting disc more compatible. Note that not all drives
support this feature.
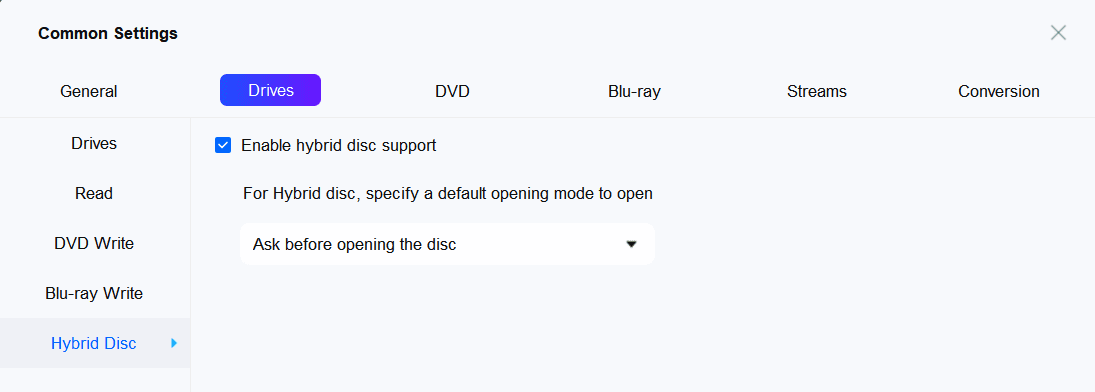
D. Hybrid Disc
A Hybrid Disc is a type of optical disc (such as a DVD or CD) that contains multiple formats of data on a single disc.
You can enable the option and then choose the default mode for opening the disc.
3.2.1.3 DVD
A. DVD Protection
By default, all the supported protection options will be ticked.
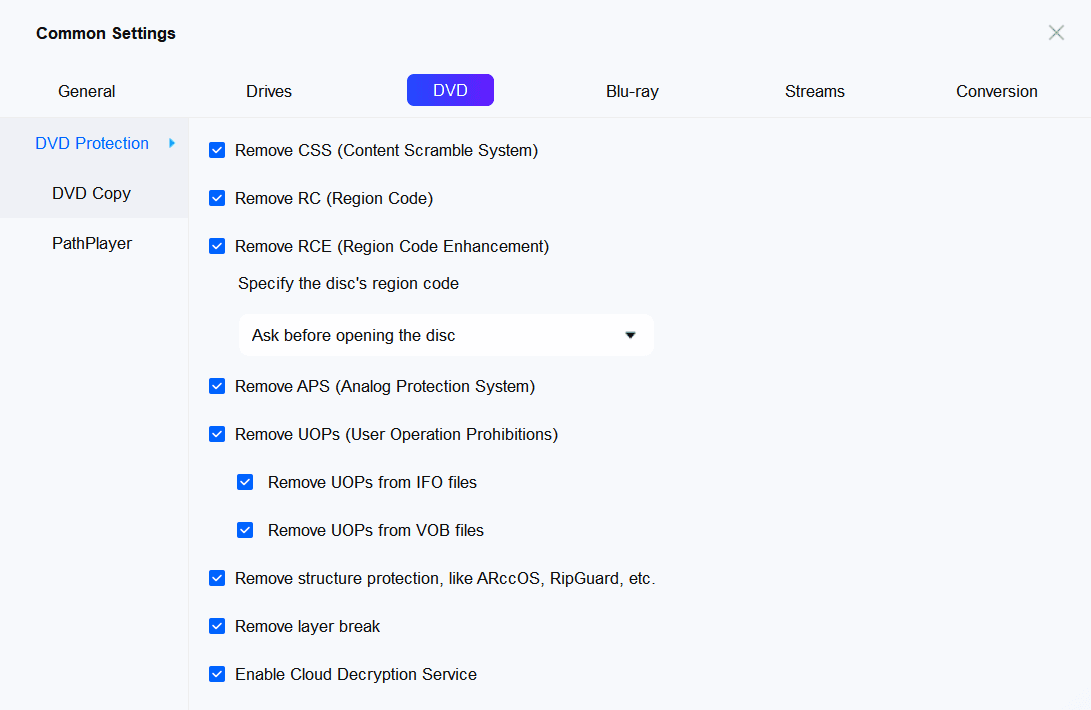
Remove CSS (Content Scramble System), RC (Region Code), RCE (Region Code Enhancement), APS (Analog Protection System), UOPs (User Operation Prohibitions), structure protection like ARccOS, RopGuard, etc, and remove layer break.
Enable Cloud Decryption Service: Using the Cloud Decryption Service to keep updated on the new protections on DVD/Blu-ray.
B. DVD Copy
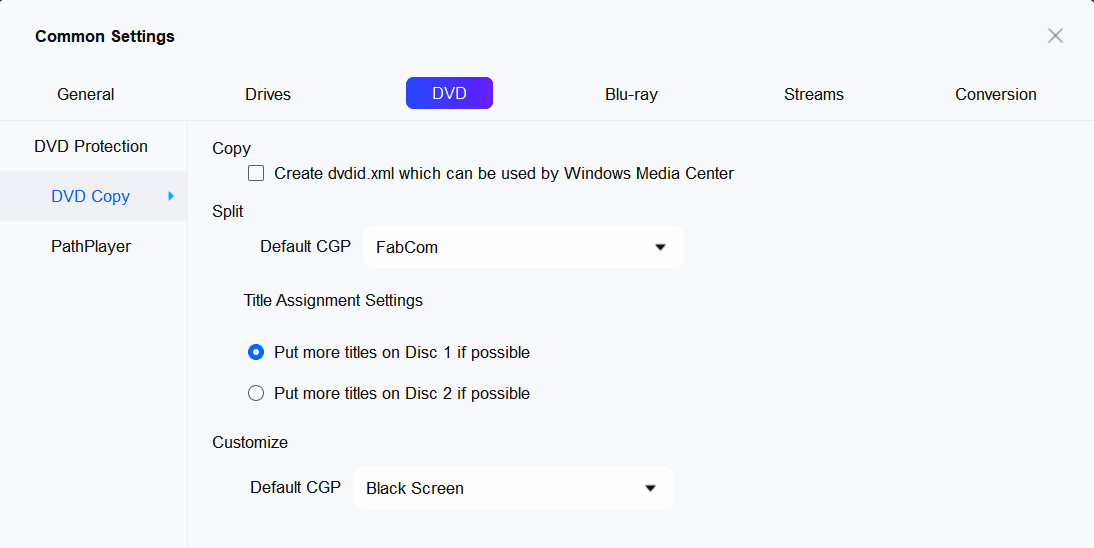
Create dvdid.xml that can be used by Windows Media Center
The settings here apply to all DVD Copy modes.
Checking this option will produce the dvdid.xml file, which helps media players like Windows Media Center recognize and display the correct information about a DVD when it is loaded.
Split
This part applies only to Split mode.
- Default CGP: You can choose Black Screen or FabCom to replace the titles that are not copied.
- Title Assignment Setting: Determine how to put titles on disc 1 and disc 2 when splitting a DVD.
Customize
This part applies only to Customize mode.
- Default CGP: You can choose Black Screen or FabCom to replace the titles that are not copied.
C. PathPlayer
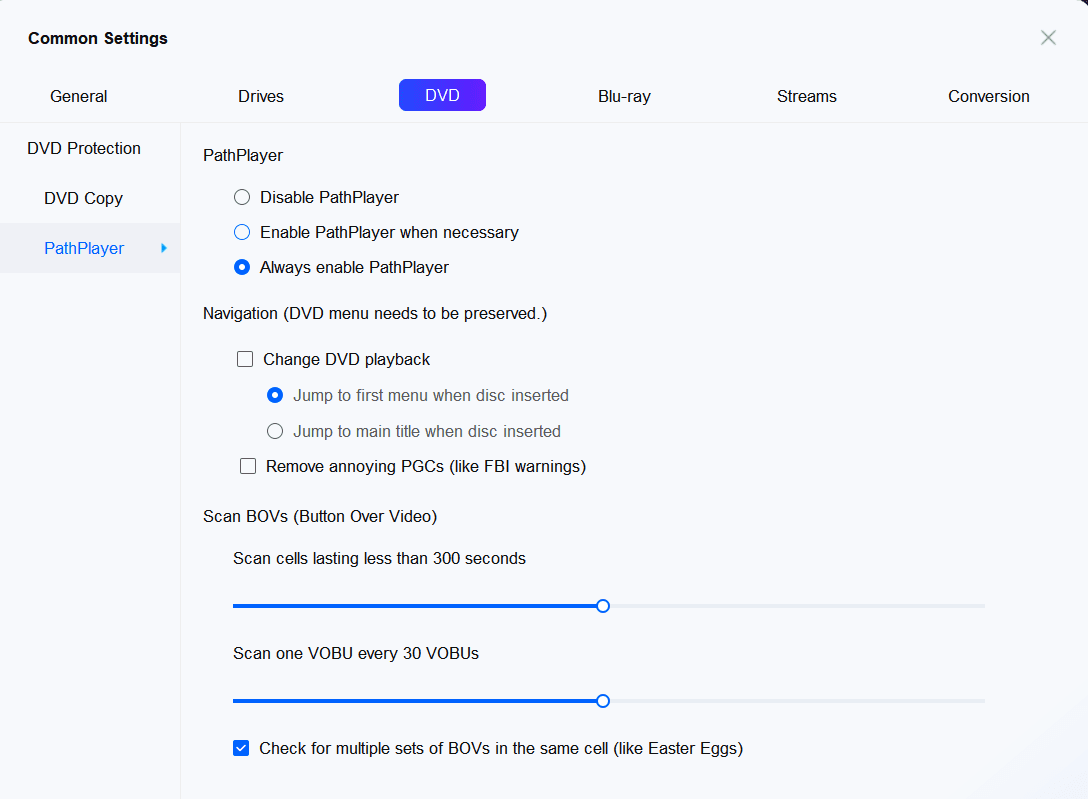
PathPlayer can check and identify all the playable contents on a DVD disc and help bypass copy protection to make a DVD playable on a real DVD player. PathPlayer may need several minutes to open a DVD as it needs to analyze the entire DVD content.
Disable PathPlayer:
If the DVD is a copy without copy protection, you can disable it to save time.
Enable PathPlayer when necessary:
If you are not sure whether a DVD is copy-protected or not, use this option.
Always Enable PathPlayer (Default):
This will scan the inserted DVD disc, sector by sector, and analyze everything on that disc.
Navigation (DVD menu needs to be preserved):
This allows the user to determine where to start playing the DVD, whether from the first menu or the main title. It also enables users to remove unwanted PGC parts, like FBI warnings.
Scan BOVs (Button Over Video):
Scanning BOVs (Button Over Video) is important because it helps to quickly access and interact with content while watching a video. By scanning these buttons, users can easily choose options, get more information, or navigate to different sections. This makes the viewing experience more engaging and interactive, allowing viewers to take action without interrupting their enjoyment of the video.
Check for multiple sets of BOVs in the same cell (like Easter Eggs):
This option tells PathPlayer to check for additional BOVs when it finds one set in a cell. A deeper analysis is needed, and it will take additional time.
3.2.1.4 Blu-ray
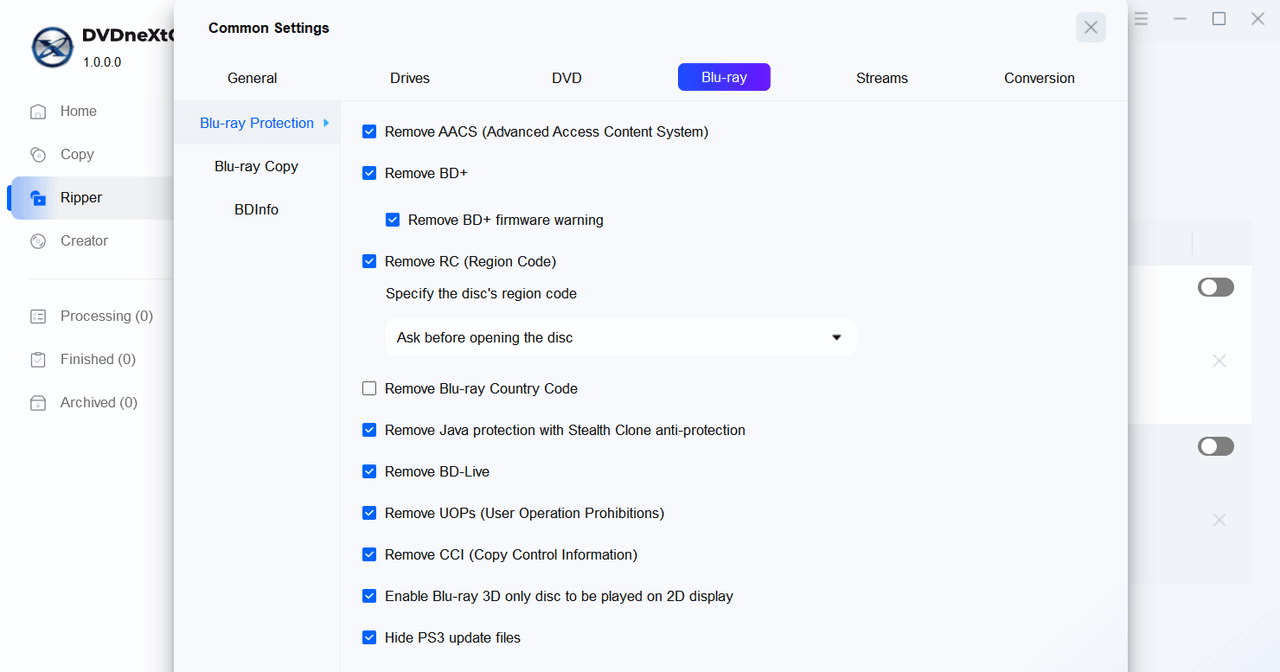
A. Blu-ray Protection
Be sure to enable the related options to get a copy without those protections.
- Remove AACS (Advanced Access Content System)
- Remove BD+/Remove BD+ Firmware Warning
- Remove RC (Region Code): This will disable the region code and make a region-free copy.
- Remove Blu-ray Country Code
- Remove BD-Live
- Remove UOPs (User Operation Prohibitions)
- Remove CCI (Copy Control Information)
Enable Blu-ray 3D-only discs to be played on a 2D display
Enable the "Hide PS3 update files" option so you don't need to update the firmware of your PS3 for playing the output file.
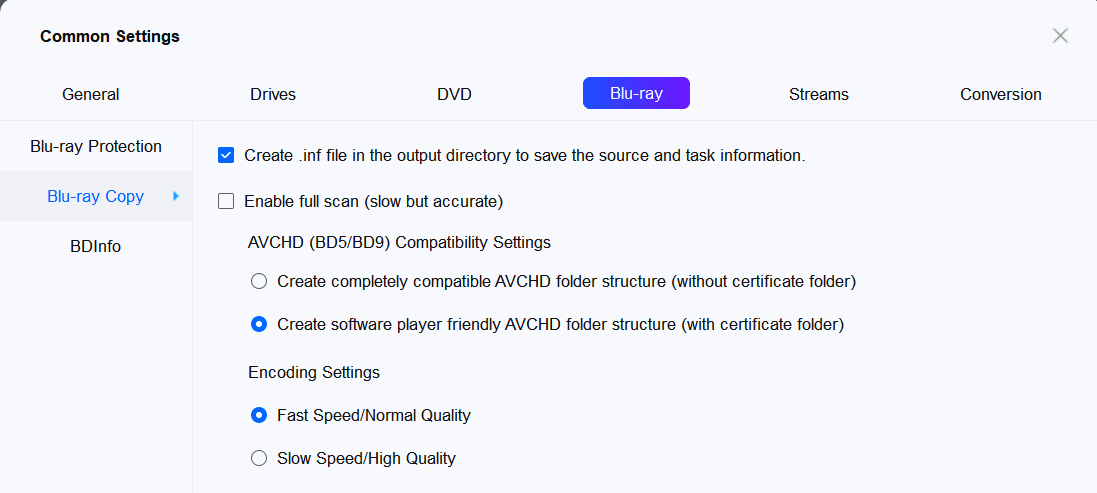
B. Blu-ray Copy
3.2.1.5 Streams
This place will help you decide what audio and subtitles to select automatically while using DVDneXtCOPY. The preselection can be overwritten on the main interface of the software.
A. Audio
Under the Audio tab, you can set the software to preselect one or more audio tracks and ignore those you don't need by default. This feature only functions when using the Copy module.
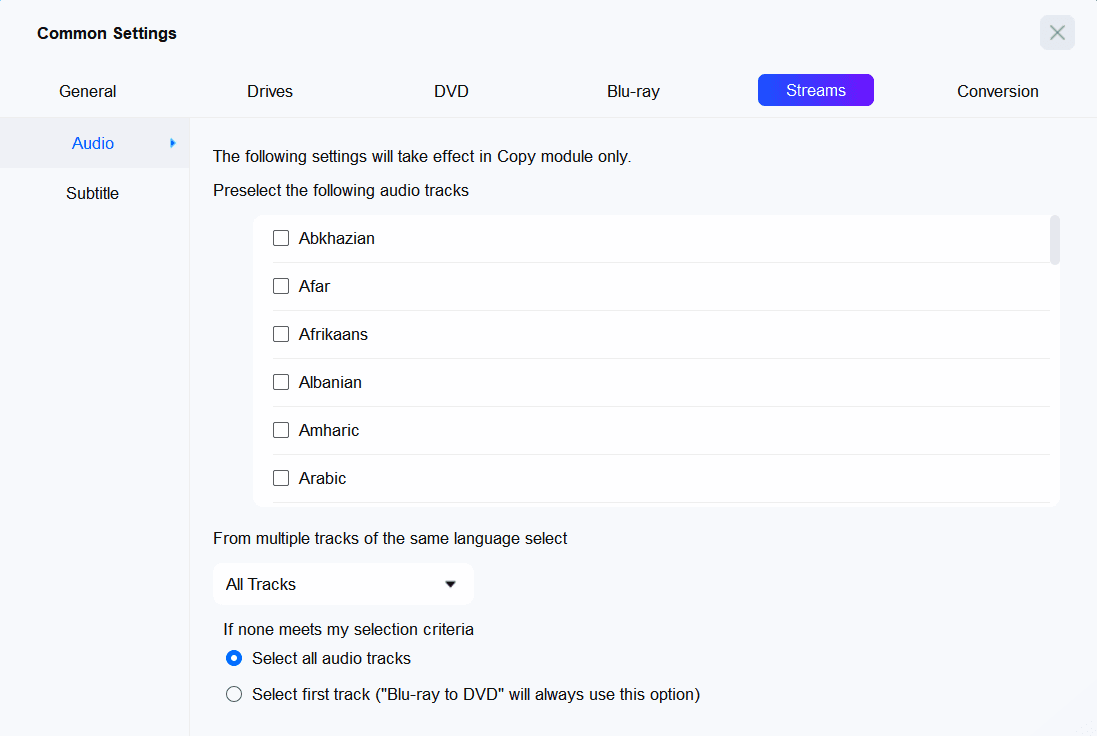
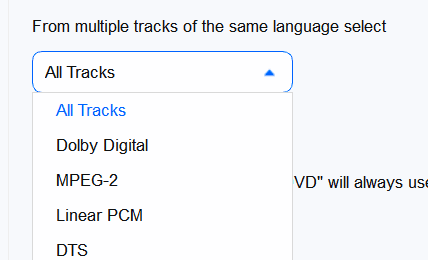
In a soundtrack that matches the language of your choice, you can also set DVDneXtCOPY to select Dolby Digital, MPEG-2, Linear PCM, or DTS, or simply let it select all soundtracks.
If there is no soundtrack that matches your settings, all soundtracks will be selected by default. Another option is to select the first soundtrack, which will be applied to the Blu-ray to DVD function all the time.
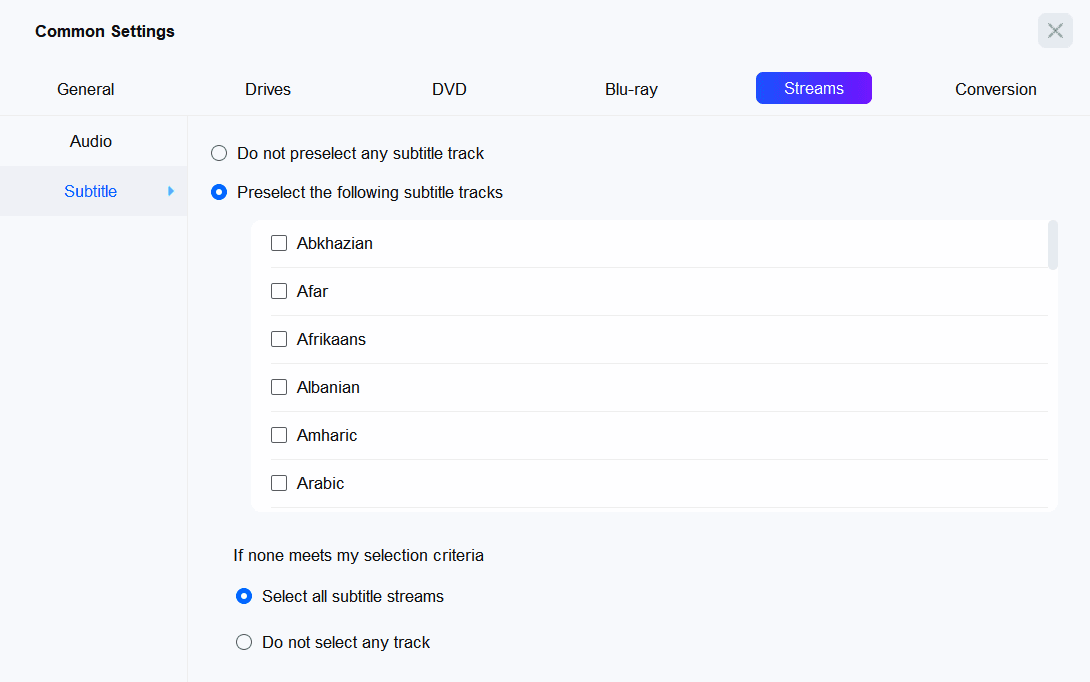
B. Subtitle
Here, you can select the subtitles of a certain language you want by default, or set it to select all or not select.
3.2.1.6 Conversion
A. Convert
The settings on this window will be applied to DVD Ripper and Blu-ray Ripper.
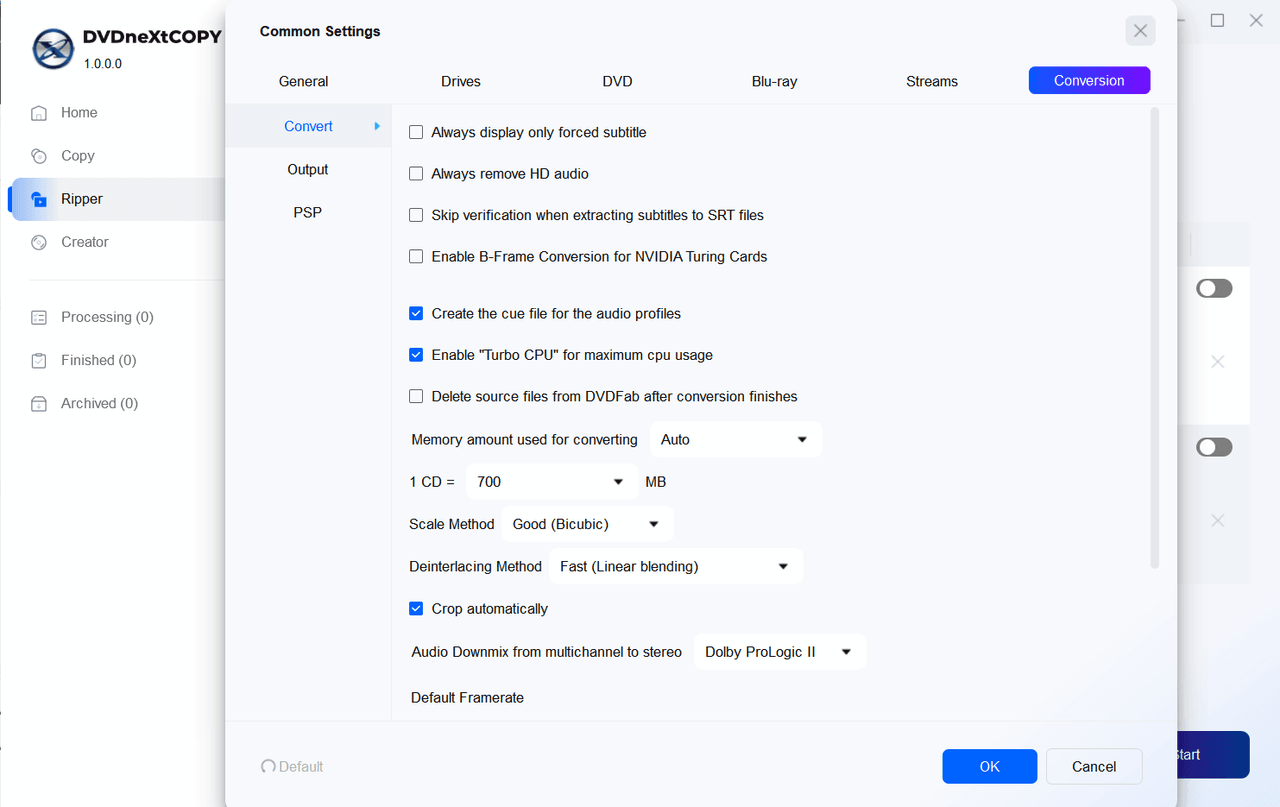
Always display the forced subtitle:
Forced subtitles are captions that appear on the screen automatically to explain important dialogue or sounds in a different language, even if the viewer hasn't selected subtitles. They are typically used in movies or shows to help viewers understand the scene when a character is speaking a foreign language.
Always remove HD Audio:
HD audio of a certain audio track will be removed and converted to lower-quality audio. For example, when you enable this option, it will convert the "English DTS-HD Master/5.1" audio track to "English DTS/5.1" (Remove HD).
Skip verification when extracting subtitles to SRT file:
When extracting subtitles to an SRT (SubRip Text) file, verification is an important step to ensure that the subtitles are correctly synchronized with the audio and that the text is accurate. In this step, you can modify or correct the text file if needed. If you don't want to perform this step, you can tick this option to quicken the extraction process.
Enable B-Frame Conversion for NVIDIA Turing cards:
B-Frame (Bidirectional frame) conversion is a feature that allows video to be encoded using B-frames, which are frames that can reference previous and future frames. This can improve video compression efficiency, resulting in smaller file sizes and better image quality at lower bit rates.
Enable "Turbo CPU" for maximum CPU usage:
Enabling "Turbo CPU" (or Turbo Boost for Intel processors and Turbo Core for AMD processors) can help maximize CPU performance. However, monitoring temperature is important because high-speed CPU operation can increase heat output.
Memory amount used for converting:
This determines the way DVDneXtCOPY uses your PC memory for conversion. You have five options to choose from: Auto, Fast Speed, Standard, High Quality, and Max.
- Auto: Automatically adjusts memory usage based on your PC and source settings. Generally, the best choice for most users.
- Fast Speed: Increases conversion speed significantly, but may reduce output quality. Suitable for quick conversions where quality is less of a concern.
- High Quality: Produces superior video quality, but conversion will be slower and output file sizes will be larger. Best for high-quality needs.
- Standard: Balances speed and quality with no significant degradation. Offers a reliable conversion experience without extreme variations.
- MAX: Intended for maximum speed, but may not be the fastest depending on your specific PC system. It’s worth testing to find the best results.
Scale Method:
You have 3 methods available for zooming in or out of a video.
- Fast (Fast bilinear)
- Good (Bicubic) -- This is the default one, as it can balance the conversion speed and video quality
- Best (Lanczos)
Deinterlacing Method:
Deinterlacing is a process used in video processing to convert interlaced videos (where alternating lines are displayed per frame) to non-interlaced or progressive format (where all lines are displayed per frame). This is particularly important when processing older video formats or preparing content for display on modern devices, which typically prefer a progressive scanning format.
You have 3 methods available for deinterlacing a video.
- Fast (Linear blending) -- This is the default method
- Good (YADIF + temporal)
- Best (YADIF + temporal + spatial)
Crop automatically:
This will crop the video automatically. You can also manually choose how to crop a video in the Video Editor window when using the Ripper module.
Audio Downmix from multichannel to stereo:
It allows you to switch options among: Stereo, Dolby Surround/Pro..., and Dolby ProLogic Ⅱ.
Default Framerate & Audio Channel:
Set the frame rate and audio channel to the same as the source or "Specified in profile".
B. Output
Here in this place, you can define how to name the output based on DVD/Blu-ray/File sources. You can set the keywords for the name, such as title, chapter, year, month, etc. Adding more keywords is also supported.

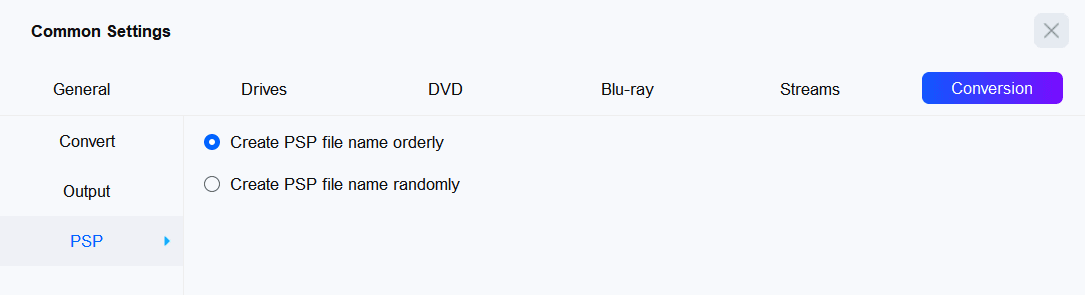
C. PSP
This allows you to create the PSP file name orderly or randomly.